Categories
GTM

live-configurator in Prestashop 1.6 not working

The live-configurator of Prestashop promises, „Live Template edits directly from the Front Office, allowing merchants to edit the colors and fonts of their online shop in just a few clicks“.

Actually it is not most fanciest tool ever developed but it is good enough to quickly give the default template a slightly different look – especially it comes in handy if your dealing with multishop and thus more themes.

ps_color_schemes_livecfg
You can choose 9 color schemes and 10 fonts

As it happens this live-configurator gives some prestarianer out there some issues. It does not save the settings or does not show up at all. If a module-reset does not help, you have a lot of threads to scan for solutions.

Another solution, imho faster: Change the settings in the database:

ps-tc
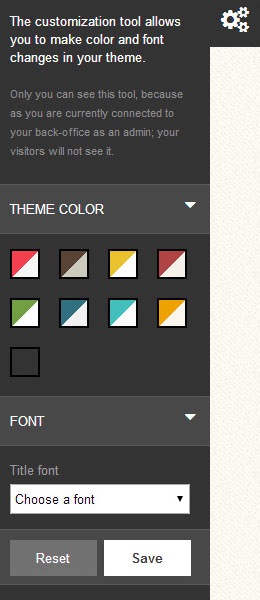
Just edit the values for PS_TC_THEMES and PS_TC_FONTS in table ps_configuration.

For themes you have can choose from theme1 to theme9 and for fonts you can opt for:

  • Open Sans
  • Josefin Slab
  • Arvo
  • Lato
  • Volkorn
  • Abril Fatface
  • Ubuntu
  • PT Sans
  • Old Standard TT
    Droid Sans

Voila!


Categories
Prestashop

Restrict payment by carrier in Prestashop multishop

These days I was playing with multishop setup in Prestashop. Apparently an old issue (and really a missing feature) popped up again: the ability to restrict payments for selected carrier.
I.e, if a customer chooses a shipment abroad we might want allow only payments via credit card.

The Addon-Store offers several modules which seem to solve this issue:

I contacted all the developers and they all confirmed that their module is working with multishop-setup. I didn’t purchase any of these so far. I really think this should be a core feature of any ecommerce software without needing an extra budget. Thus I was looking to solve the issue without purchasing a module.

So far I used Ship to Pay for PrestaShop v1.0.2
Although the site states that the module only works for PS 1.4 & 1.5 I used it without problems in PS 1.6 (specifically up to 1.6.1.3). But when setting up multishop feature I ran into issues.

ship2pay

First, as you can see on the screenshot the settings are kind of a mess. It seems each payment for each shop is listed, without giving you any idea which shop/payment-combination you are configuring. Well, this could be handled via trial and error.

The real issue is that for whatever reasons my desired combinations are not saved correctly.

In my case the module “cheque” was associated with all carriers. As I misuse the module for “Pay cash on Pickup” I don’t want to provide this payment method when a customer selects international shipping.

But luckily this can be solved via database:

  1. Save your desired combination and reload the page
  2. Check which associations are wrong (missing or wrong)
  3. Check in your database table ps_ship2pay where you see the associations of carriers and your payment methods.
    ps_ship2pay
  4. Now you can add missing assocations or delete wrong associations.
  5. Voila!

Pls. note that these settings apply to all shops, a “real” multishop-support needs some adaption of the code. If you want to use different payment modules in you various shops you should upfront define desired settings by activating/deactivating the payment modules for each shop.

Categories
GTM

Google Tag Manager in Prestshop installieren

Den Google Tag Manager installieren geht sehr einfach und schnell. In diesem Fall kann man auch guten gewissens auf die Google-Hilfe verweisen

  1. Konto erstellen
  2. Container erstellen
  3. Container-Snippet hinzufügen
  4. Tags hinzufügen, aktualisieren und veröffentlichen


Konto erstellen

Als erstes muss man sich unter www.google.com/tagmanager/ anmelden. Normalerweise reicht ein Konto – über Container kann man dann auch ohne weiteres mehrere Webseiten verwalten.


Container erstellen

Der Container ist das “Sammelbecken” für alle Tags einer Seite


Container-Snippet hinzufügen

Damit die enthaltenen Tags ausgführt werden können muss das Container-Snippet auf der Website eingefügt werden. Füge es gleich nach dem öffnenden <body> ein.

Für WordPress gibt es dafür zahlreiche Plugins. Ebenso für Prestashop, daber dzt. nur kostenpflichtige. Es geht aber auch ganz einfach per Hand. Einfach die Datei header.tpl im Theme-Folder bearbeiten. Wichtig: das Snippet muss innerhalb von Literal-Tags platziert werden, damit Smarty die Zeilen korrekt interpretiert. Das sieht dann in etwas so aus:

<body{if isset($page_name)} id="{$page_name|escape:'html':'UTF-8'}"{/if} class="{if $logged}registered {else}guest {/if}{if isset($page_name)}{$page_name|escape:'html':'UTF-8'}{/if}{if isset($body_classes) && $body_classes|@count} {implode value=$body_classes separator=' '}{/if}{if $hide_left_column} hide-left-column{/if}{if $hide_right_column} hide-right-column{/if}{if $content_only} content_only{/if} lang_{$lang_iso}">
{* GTM container  start*}
   {literal}
      {<noscript><iframe src="//www.googletagmanager.com/ns.html?id=GTM-Z9H2"
      height="0" width="0" style="display:none;visibility:hidden"></iframe></noscript>
      <script>(function(w,d,s,l,i){w[l]=w[l]||[];w[l].push({'gtm.start':
      new Date().getTime(),event:'gtm.js'});var f=d.getElementsByTagName(s)[0],
      j=d.createElement(s),dl=l!='dataLayer'?'&l='+l:'';j.async=true;j.src=
      '//www.googletagmanager.com/gtm.js?id='+i+dl;f.parentNode.insertBefore(j,f);
      })(window,document,'script','dataLayer','GTM-XXXX');</script>
   {/literal}
{* GTM container  end*}

Tags erstellen

Wenn der Container einaml läuft passiert eigentlich noch gar nichts. Dafür muss erst die Tags erstellen. Dafür gibts zahlreiche Möglichkeiten, z.B Tracking mit Google Analytics, Piwik, usw. Einige davon werde ich hier behandeln.